If you’ve ever noticed your car struggling to start, hesitating while accelerating, or having poor fuel economy, it could be a sign that your fuel system needs some TLC. While many people only think about engine oil and tires when it comes to car maintenance, your vehicle’s fuel system is just as important. Keeping it clean and functioning well is essential for optimal engine performance and longevity.
In this step-by-step guide, we’ll walk you through how to clean your car’s fuel system. It may seem like a complicated task, but with a little knowledge and the right tools, you can make sure your car’s fuel system runs smoothly and efficiently. Not only will this help your car run better, but it can also save you money in the long run by preventing bigger, more expensive issues.
Why Cleaning Your Fuel System Matters
Before jumping into the cleaning process, let’s talk about why it’s so important to clean your car’s fuel system in the first place. The fuel system delivers fuel to the engine, and over time, contaminants like dirt, debris, and carbon deposits can build up, making it harder for your engine to get the clean fuel it needs. This can lead to a number of problems, including:
Poor acceleration: The engine may not be getting enough fuel, causing hesitation when you try to accelerate.
Decreased fuel efficiency: Dirty fuel injectors can reduce the amount of fuel your car uses, meaning you’ll have to fill up more often.
Engine misfires or rough idling: If the injectors are clogged or the fuel filter is blocked, your engine may misfire or run roughly.
Increased emissions: A dirty fuel system can lead to inefficient fuel burning, which increases harmful emissions.
By regularly cleaning your fuel system, you ensure that everything runs smoothly, your engine gets the right amount of fuel, and you avoid some of these annoying and costly problems.
Tools and Materials You’ll Need
Before diving into the cleaning process, you’ll need a few tools and materials. Don’t worry, nothing too fancy is required—just a few basic items!
What You’ll Need:
- Fuel system cleaner (specific for your car model)
- Fuel filter (it’s a good idea to replace this while cleaning)
- Socket wrench set or basic hand tools (to remove the fuel filter and components)
- Safety gloves and goggles (fuel and chemicals can be dangerous)
- Catch pan or tray (to catch any spilt fuel)
- Compressed air or air blower (optional but helps with cleaning the components)
- Rags or paper towels (for wiping off any excess cleaner or fuel)
- Car jack and stands (if needed, for lifting your vehicle)
Once you’ve gathered everything, you’re ready to start the process!

Step 1: Prepare Your Car and Workspace
Before working on your fuel system, safety is key. Make sure the car is parked on a flat surface, and the engine is completely cool. If you have a garage, make sure it’s well-ventilated, as the fumes from fuel cleaners can be harmful. If you’re working outside, make sure it’s in a safe spot where there are no open flames or sparks.
Put on your gloves and goggles for safety, as you’ll be working with fuel and chemicals. It’s also a good idea to disconnect the battery to prevent any electrical mishaps while working on the fuel system.
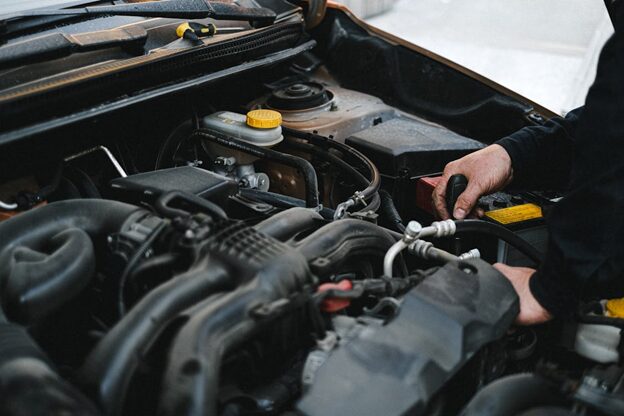
Step 2: Locate the Fuel Filter
The fuel filter is a key part of the fuel system and often gets clogged with dirt and debris over time. Most vehicles have a fuel filter located along the fuel line between the gas tank and the engine, but some are located inside the fuel tank itself.
To locate the fuel filter, consult your vehicle’s owner’s manual, which will provide specific details for your car model. Once you’ve located it, use your socket wrench to carefully remove the filter. Be sure to place a catch pan underneath to catch any fuel that might spill out during the removal.
Step 3: Apply the Fuel System Cleaner
Once the fuel filter is removed, it’s time to clean the system itself. Start by applying a fuel system cleaner to the injectors. These cleaners are designed to break down carbon and other debris that can clog the injectors. There are two main ways to apply cleaner:
Option 1: Through the Fuel Tank
Some fuel system cleaners are designed to be added directly to the fuel tank. To do this, simply pour the cleaner into your fuel tank according to the manufacturer’s instructions, then drive your car around for about 20 to 30 minutes to allow the cleaner to work through the system.
Option 2: Manual Injection into the Fuel Line
For a more thorough cleaning, some cleaners can be manually injected into the fuel line. You’ll need to connect a cleaning kit that hooks up to the fuel line. The cleaning kit usually has a special nozzle or adapter that lets you feed the cleaner into the system directly, bypassing the fuel tank. This method is more effective but requires some basic mechanical knowledge.

Step 4: Clean the Fuel Injectors (Optional)
If you feel comfortable, you can go the extra mile and clean the fuel injectors directly. This step is optional, but it can help restore performance if you’ve been experiencing rough idling or poor acceleration. To clean the injectors:
- Disconnect the fuel line that feeds the injectors.
- Use an injector cleaning kit or spray cleaner specifically designed for this purpose.
- Spray the cleaner directly into the injector ports while the engine is running (some kits will have you use a special nozzle to spray the cleaner into the air intake system).
- Allow the engine to run for several minutes to burn off the cleaner.
- Be cautious when doing this—make sure the area is well-ventilated, as you’ll be working with potentially harmful chemicals.
Step 5: Replace the Fuel Filter
Now that your fuel system is clean, it’s time to replace the fuel filter. Grab the new filter and install it in place of the old one, making sure the flow direction is aligned properly. This is crucial, as installing the filter incorrectly can cause fuel flow issues.
Once the new filter is in place, make sure everything is tightened securely. You don’t want any fuel leaks during operation.
Step 6: Test Your Vehicle
Now that the fuel system is clean and the new fuel filter is in place, it’s time to test your vehicle. Reconnect the battery if you had disconnected it earlier, and start the engine. It might take a few tries for the engine to start, as the fuel system is still getting used to the cleaner. Once it’s running, pay attention to any unusual sounds or behaviors.
Take the car for a short test drive to make sure everything feels normal. Pay attention to how it accelerates, idles, and handles. If the vehicle runs smoother, you’ve likely done a great job!
Step 7: Dispose of Any Waste Properly
Finally, make sure to properly dispose of any waste, including the old fuel filter, the catch pan, and any used cleaner. Do not pour fuel or chemicals down the drain, as they can be harmful to the environment. Check with your local waste disposal company for safe ways to dispose of these materials.
Keep Your Car Fuel Repair System Running Smoothly With the Experts
At AA Transmissions, we understand how vital it is to keep your car performing at its best, and our experienced team is here to help with any repair or service needs you may have.
Whether it’s a fuel system clean-up, transmission service, or any other vehicle repair, our certified technicians have the expertise to get the job done right. With over 50 years of experience, you can trust AA Transmissions to keep your vehicle running smoothly.